GPU computation on Amazon EC2
Running a deep learning algorithm properly is not a big deal. We discuss the setting that allows us to run a deep learning algorithm, in particular neural stype on Amazon GPU instances.
Table of content
Introduction
As mentioned in this previous blog post ‘nips 2016 neural style’, running this deep learning algorithm for image rendering is very computational intensive. It is pretty slow on a traditional CPU cluster. Naturally, we would like to run this algorithm on GPU to achieve a feasible computation. As long as you have a desktop/laptop, you have a CPU, but the problem is that not everyboday have a GPU. It seems to me that we have two options:
- Purchase your own GPU and make a GPU cluster.
- Use cloud computing services e.g., Amazon EC2.
I don’t have the money to buy my own GPU cluster. Therefore, I will be using Amazon EC2 GPU computing services. The cost of computing is roughly 0.7 euro per hour.
Installation
-
Install torch 7 manually
Run the following command in terminal to install torch 7
cd ~/
curl -s https://raw.githubusercontent.com/torch/ezinstall/master/install-deps | bash
git clone https://github.com/torch/distro.git ~/torch --recursive
cd ~/torch; ./install.sh
Remember to use
sudoright during the installation. If you use Amazon EC2 GPU cluster with Amazon Machine Image (ami-2557e256), you do not have to worry about torch 7 as it is already installed for this machine image. -
Install loadcaffe
-
Take a look at the official website of loadcaffee from github and follow the instucution there. Otherwise, please go ahead with the following steps.
-
loadcaffe has no caffe dependency, but you need to install protobuf with the following command
sudo apt-get install libprotobuf-dev protobuf-compilerIf two packages cannot be found from the repository, you need to update your
apt-getwith the following commandsudo apt-get updateAnd you will just be fine.
-
Then you should install loadcaffe package by running the following command
sudo luarocks install loadcaffeIn case that
luarockscannot find the loadcaffe package, the problem can be solved with the following command at least in my casesudo luarocks --from=https://raw.githubusercontent.com/torch/rocks/master/ install loadcaffeAgain you will just be fine.
-
-
Install neural-style
-
Now we have environment ready. We should go ahead with real stuffs. Take a look at the neural-style in github.
-
Clone the package with the following git command
git clone git@github.com:jcjohnson/neural-style.git -
Get into the cloned directory and download VGG model with the following command
sh models/download_models.sh
-
Running
-
Right now, running neural-style is pretty straight-forward. In particular, you can try the following example code
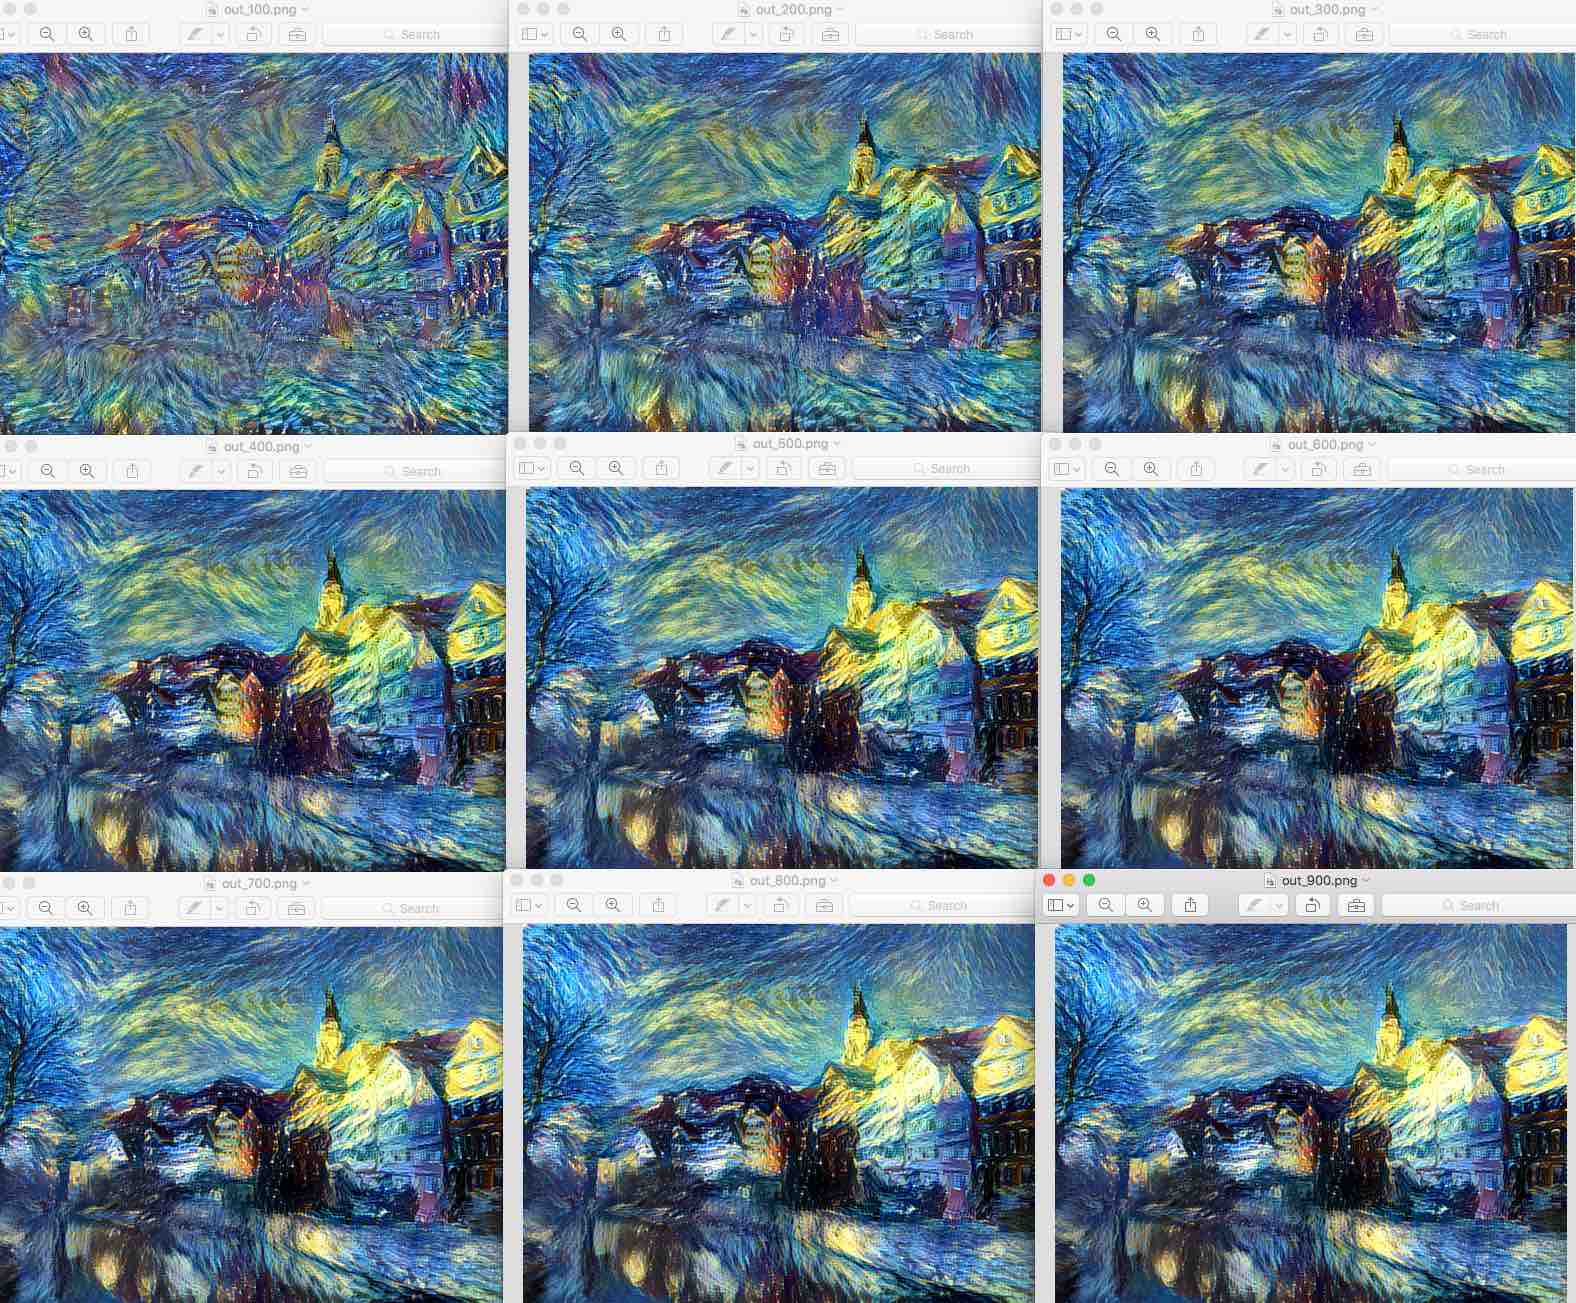
th neural_style.lua -style_image examples/inputs/starry_night.jpg -content_image examples/inputs/tubingen.jpg -
After about 700 iteration, your rendering should be ready. Copy the result from Amazon EC2 to your local with the following command
scp -i SparkEC2Key.pem ubuntu@ec2-54-229-54-221.eu-west-1.compute.amazonaws.com:~/neural-style/*png ~/Desktop/And yes, your Amazon EC2 instance is just like a normal server and can be accessed with
sshandscp. -
Now the cool thing is that the running time is just about 2 mins on GPU instead of very very long on CPU.
-
You also get intermediate pictures at 100, 200, …, upto 1000 iterations.
External reading materials
There are always some cool information available on the web. In particular, I find the following blogs useful.
-
How to install Theano on Amazon EC2 GPU. This is s simple, clear, instructive blog about installing deep learning environment such as theano and cuda on Amazon EC2 GPU instance.
-
Using covnet to detect facial keypoints is a tutorial for a kaggle competition.
-
Jeff Barr’s introductory blog post on the GPU computing with Amazon - ‘build 3D streaming application with EC2’s G2 instance’.